


Flutter主轴对齐插件more_main_axis_alignment的使用
Flutter主轴对齐插件more_main_axis_alignment的使用
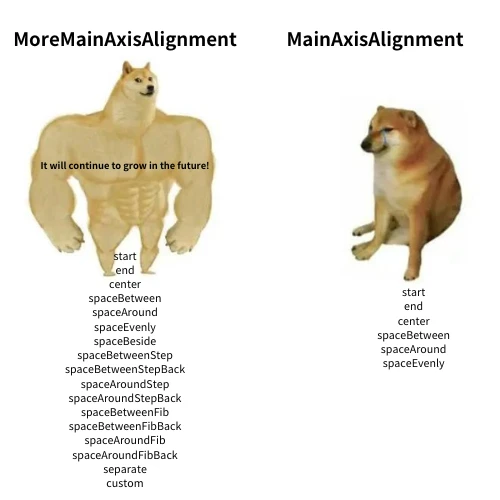
特性
入门指南
在你的pubspec.yaml文件中添加包依赖:
dependencies:
  more_main_axis_alignment: 1.0.0
在你的Dart文件中导入库:
import 'package:more_main_axis_alignment/more_main_axis_alignment.dart';
使用方法
Flex
MoreFlex(
    direction: Axis.horizontal, // 指定Flex的方向为水平
    moreMainAxisAlignment: MoreMainAxisAlignment.spaceBeside, // 设置主轴对齐方式
    children: [
      for (int i = 0; i < 5; i++)
        Container(
          width: 20,
          height: 20,
          decoration: BoxDecoration(
            color: Colors.blue,
            borderRadius: BorderRadius.circular(10),
          ),
        ),
    ],
  ),
Row
MoreRow(
    moreMainAxisAlignment: MoreMainAxisAlignment.spaceBetweenStep, // 设置主轴对齐方式
    children: [
      for (int i = 0; i < 5; i++)
        Container(
          width: 20,
          height: 20,
          decoration: BoxDecoration(
            color: Colors.blue,
            borderRadius: BorderRadius.circular(10),
          ),
        ),
    ],
  ),
Column
MoreColumn(
    moreMainAxisAlignment: MoreMainAxisAlignment.custom, // 设置自定义对齐方式
    customList: const [0, 0.25, 0.35, 0.5, 0.98], // 自定义对齐点
    children: [
      for (int i = 0; i < 5; i++)
        Container(
          width: 20,
          height: 20,
          decoration: BoxDecoration(
            color: Colors.blue,
            borderRadius: BorderRadius.circular(10),
          ),
        ),
    ],
  ),
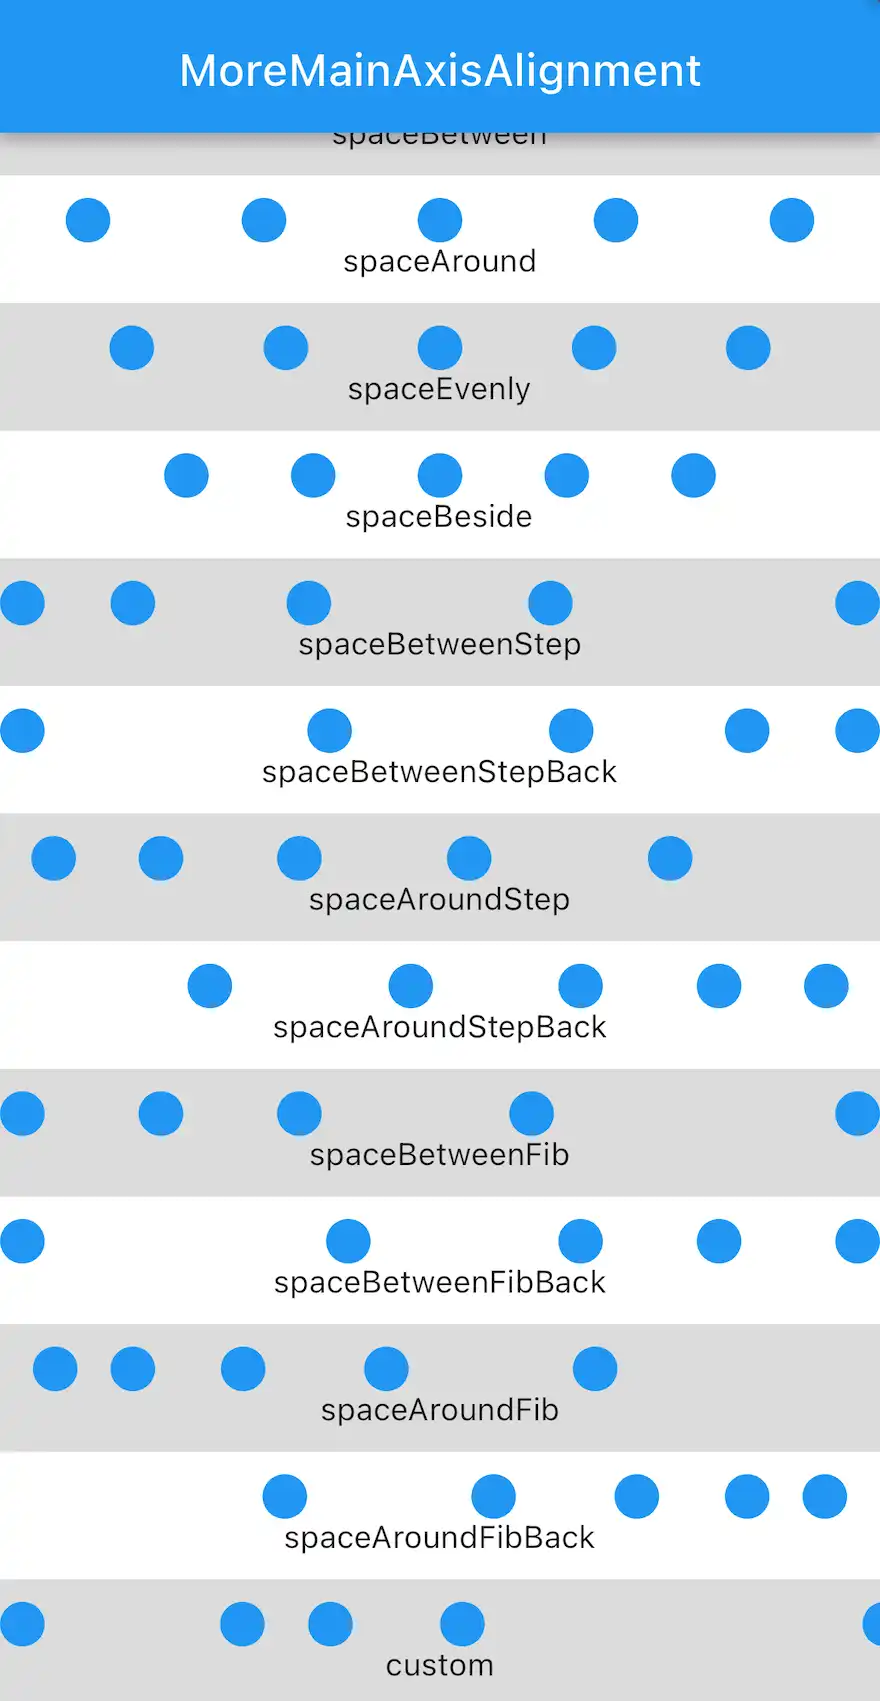
完整示例
以下是一个完整的示例,展示了如何使用MoreMainAxisAlignment的不同值来对齐子组件。
import 'package:flutter/material.dart';
import 'package:more_main_axis_alignment/more_main_axis_alignment.dart';

void main() {
  runApp(const MyApp());
}

class MyApp extends StatelessWidget {
  const MyApp({super.key});

  [@override](/user/override)
  Widget build(BuildContext context) {
    return const MaterialApp(
      title: 'Flutter Demo',
      home: MyHomePage(title: 'MoreMainAxisAlignment'),
    );
  }
}

class MyHomePage extends StatefulWidget {
  const MyHomePage({super.key, required this.title});

  final String title;

  [@override](/user/override)
  State<MyHomePage> createState() => _MyHomePageState();
}

class _MyHomePageState extends State<MyHomePage> {
  [@override](/user/override)
  Widget build(BuildContext context) {
    return Scaffold(
      appBar: AppBar(
        title: Text(widget.title),
      ),
      body: Center(
        child: ListView.builder(
          itemCount: MoreMainAxisAlignment.values.length,
          itemBuilder: (context, index) {
            return Container(
              color: index.isEven ? Colors.white : Colors.black12,
              padding: const EdgeInsets.symmetric(vertical: 10),
              child: Column(
                children: [
                  MoreFlex(
                    direction: Axis.horizontal,
                    moreMainAxisAlignment: MoreMainAxisAlignment.values[index],
                    customList: const [0, 0.25, 0.35, 0.5, 0.98],
                    separateCount: 3,
                    children: [
                      for (int i = 0; i < 5; i++)
                        Container(
                          width: 20,
                          height: 20,
                          decoration: BoxDecoration(
                            color: Colors.blue,
                            borderRadius: BorderRadius.circular(10),
                          ),
                        ),
                    ],
                  ),
                  Text(MoreMainAxisAlignment.values[index].toShortString()), // 显示当前对齐方式的简短名称
                ],
              ),
            );
          },
        ),
      ),
    );
  }
}

extension on MoreMainAxisAlignment {
  String toShortString() {
    return toString().split('.').last; // 将枚举值转换为简短字符串
  }
}
更多关于Flutter主轴对齐插件more_main_axis_alignment的使用的实战教程也可以访问 https://www.itying.com/category-92-b0.html
1 回复

更多关于Flutter主轴对齐插件more_main_axis_alignment的使用的实战系列教程也可以访问 https://www.itying.com/category-92-b0.html
当然,以下是一个关于如何在Flutter中使用more_main_axis_alignment插件的示例代码。这个插件提供了额外的主轴对齐选项,这些选项在标准的Flutter布局组件中可能不可用。
首先,确保你已经在pubspec.yaml文件中添加了more_main_axis_alignment依赖:
dependencies:
  flutter:
    sdk: flutter
  more_main_axis_alignment: ^x.y.z  # 替换为最新版本号
然后,运行flutter pub get来安装依赖。
接下来,你可以在你的Flutter应用中使用这个插件。以下是一个简单的示例,展示了如何使用more_main_axis_alignment中的对齐选项:
import 'package:flutter/material.dart';
import 'package:more_main_axis_alignment/more_main_axis_alignment.dart';

void main() {
  runApp(MyApp());
}

class MyApp extends StatelessWidget {
  @override
  Widget build(BuildContext context) {
    return MaterialApp(
      home: Scaffold(
        appBar: AppBar(
          title: Text('More Main Axis Alignment Example'),
        ),
        body: Center(
          child: Column(
            mainAxisAlignment: MainAxisAlignment.center,
            children: <Widget>[
              // 使用标准的MainAxisAlignment
              Container(
                height: 50,
                color: Colors.blue,
                child: Center(child: Text('Standard Center')),
              ),
              SizedBox(height: 20),

              // 使用more_main_axis_alignment插件的对齐选项
              Expanded(
                child: Row(
                  mainAxisAlignment: MoreMainAxisAlignment.spaceBetweenIncludingPadding,
                  children: <Widget>[
                    Container(
                      width: 50,
                      height: 50,
                      color: Colors.red,
                    ),
                    Container(
                      width: 50,
                      height: 50,
                      color: Colors.green,
                    ),
                    Container(
                      width: 50,
                      height: 50,
                      color: Colors.blue,
                    ),
                  ],
                ),
              ),

              SizedBox(height: 20),

              // 另一个示例:使用MoreMainAxisAlignment.justifyIncludingPadding
              Expanded(
                child: Row(
                  mainAxisAlignment: MoreMainAxisAlignment.justifyIncludingPadding,
                  children: List.generate(5, (index) {
                    return Container(
                      width: 50,
                      height: 50,
                      color: Colors.orange[100 * (index % 9)],
                      child: Center(child: Text('$index')),
                    );
                  }),
                ),
              ),
            ],
          ),
        ),
      ),
    );
  }
}
在这个示例中,我们展示了如何使用more_main_axis_alignment插件提供的两个额外对齐选项:
MoreMainAxisAlignment.spaceBetweenIncludingPadding:这个选项会在子元素之间添加间隔,同时考虑父容器的内边距。MoreMainAxisAlignment.justifyIncludingPadding:这个选项会将子元素分散在父容器中,同时考虑父容器的内边距,使它们两端对齐。
请注意,这些对齐选项在标准Flutter布局组件中可能不可用,因此more_main_axis_alignment插件提供了一个有用的补充。
确保在实际使用中查看插件的文档,以了解所有可用的对齐选项及其具体行为。